Showing posts with label cookies. Show all posts

Tuesday, July 24, 2012

Chocolate Pot de Creme with Pistachio Shortbread

Around these parts, there's a grocery store that's famous for good food. Bi-Rite Market is a neighborhood institution known for its carefully chosen, locally-made, organic foods of all kinds, and I always walk out with a smile on my face and something absolutely delicious in my bag.

One of their awesome creations is particularly drool-worthy, though unassuming in its small plastic container, and seems to always work its way into my shopping basket. Chocolate Pot de Creme is somewhere between mousse, ganache and pudding and can be made into elegant individual desserts or saved for a late night pajama craving. Luckily for me (and you), Bi-Rite recently published a book called Eat Good Food, describing the best ways to shop, store and prepare your food, and it includes this recipe!


The ingredients aren't complicated, but make sure that you get good quality chocolate - no Hershey's here! For budget shoppers I suggest Trader Joe's pound plus bars, or if you want to splurge pick up some Scharffen-Berger or Tcho. Dark chocolate (70-75%) will make a sinfully rich and deep flavor, while milk chocolate (60-65%) will be significantly lighter and more pudding-like. I used 4-oz canning jars, but you can use tea cups, small bowls, even martini glasses as the mood strikes you!

And what's better to accompany your pot de creme than the light, buttery crunch of pistachio shortbread? They're the perfect sidekick with a contrasting texture and complementary flavor, and taste fantastic with your coffee the next morning. Elegant but simple, they're the best cookies I've made in a long time.

Chocolate Pot de Creme
From Bi-Rite Market's Eat Good Food
Makes 8 4-oz servings

6 oz semisweet or dark chocolate, chopped
2 C heavy whipping cream
3/4 C + 2 Tbsp half and half
1/8 tsp salt
6 Tbsp sugar
9 egg yolks (freeze the egg whites to use later!)
1/2 tsp vanilla extract
Fresh whipped cream and/or shaved chocolate for garnish

Directions: Place chopped chocolate in a large heatproof bowl and set aside. Combine egg yolks and 3 Tbsp sugar in a medium bowl and whisk until smooth, then set aside. Combine cream, half and half and 3 Tbsp sugar in a medium saucepan and cook over medium-high heat, stirring occasionally until just before it simmers (small bubbles appear around the edge of the pan).

Pour about a cup of the hot cream mixture into the egg yolks while whisking constantly, then pour yolk mixture back into the saucepan and whisk constantly until smooth. Put the pan back onto medium-high heat and cook, stirring constantly, for 2-3 minutes until the mixture has the texture of pureed soup.

Pour cream mixture over chocolate and let sit for 3-5 minutes. Slowly and gently stir with a whisk until smooth, being careful not to incorporate air. Add vanilla and stir to blend.

Pour mixture through a fine strainer into a measuring cup, then divide among containers. refrigerate, uncovered for 2 hours and then wrap tightly and refrigerate for at least another 4 hours before serving. Let the pots de creme sit at room temperature for 15 minutes before serving. To store longer, you can freeze the containers.

Pistachio Shortbread
From Bon Appetit, via Epicurious
Makes about 36 cookies

1 1/2 C all-purpose flour
1/2 C + 2 Tbsp powdered sugar
1/2 tsp salt
3/4 C (1 1/2 sticks) butter, chilled and cut into 1/2 inch pieces
1/2 C roasted, unsalted pistachios
1 egg yolk
3/4 tsp vanilla extract

Directions: Chop pistachios in a food processor into a coarse meal. Set aside. Mix together flour, sugar and salt using the food processor. Add butter, pistachios, egg yolk and vanilla and pulse until ball of dough forms. Divide dough into two parts, and roll each into a log about 1 1/2 inches in diameter. Wrap with plastic wrap and refrigerate for 4 hours, or until firm. (At this point you can freeze the dough for later)

Preheat oven to 325 degrees. Prepare a baking sheet with parchment. Slice logs into 1/4 inch thick pieces, re-rolling if necessary to reshape. Place on baking sheet about 1 inch apart and bake until lightly golden, about 18 minutes.

Thursday, April 26, 2012

Peanut Butter Cup Brownies

Some people don't like the combination of peanut butter and chocolate, but for the other 99% I've got a pretty awesome new way to eat it.


What appears to be a regular old delicious brownie...


...has a peanut butter cookie dough core! Like a giant, ridiculously good peanut butter cup, this treat has the best of both flavors and a fantastic texture.

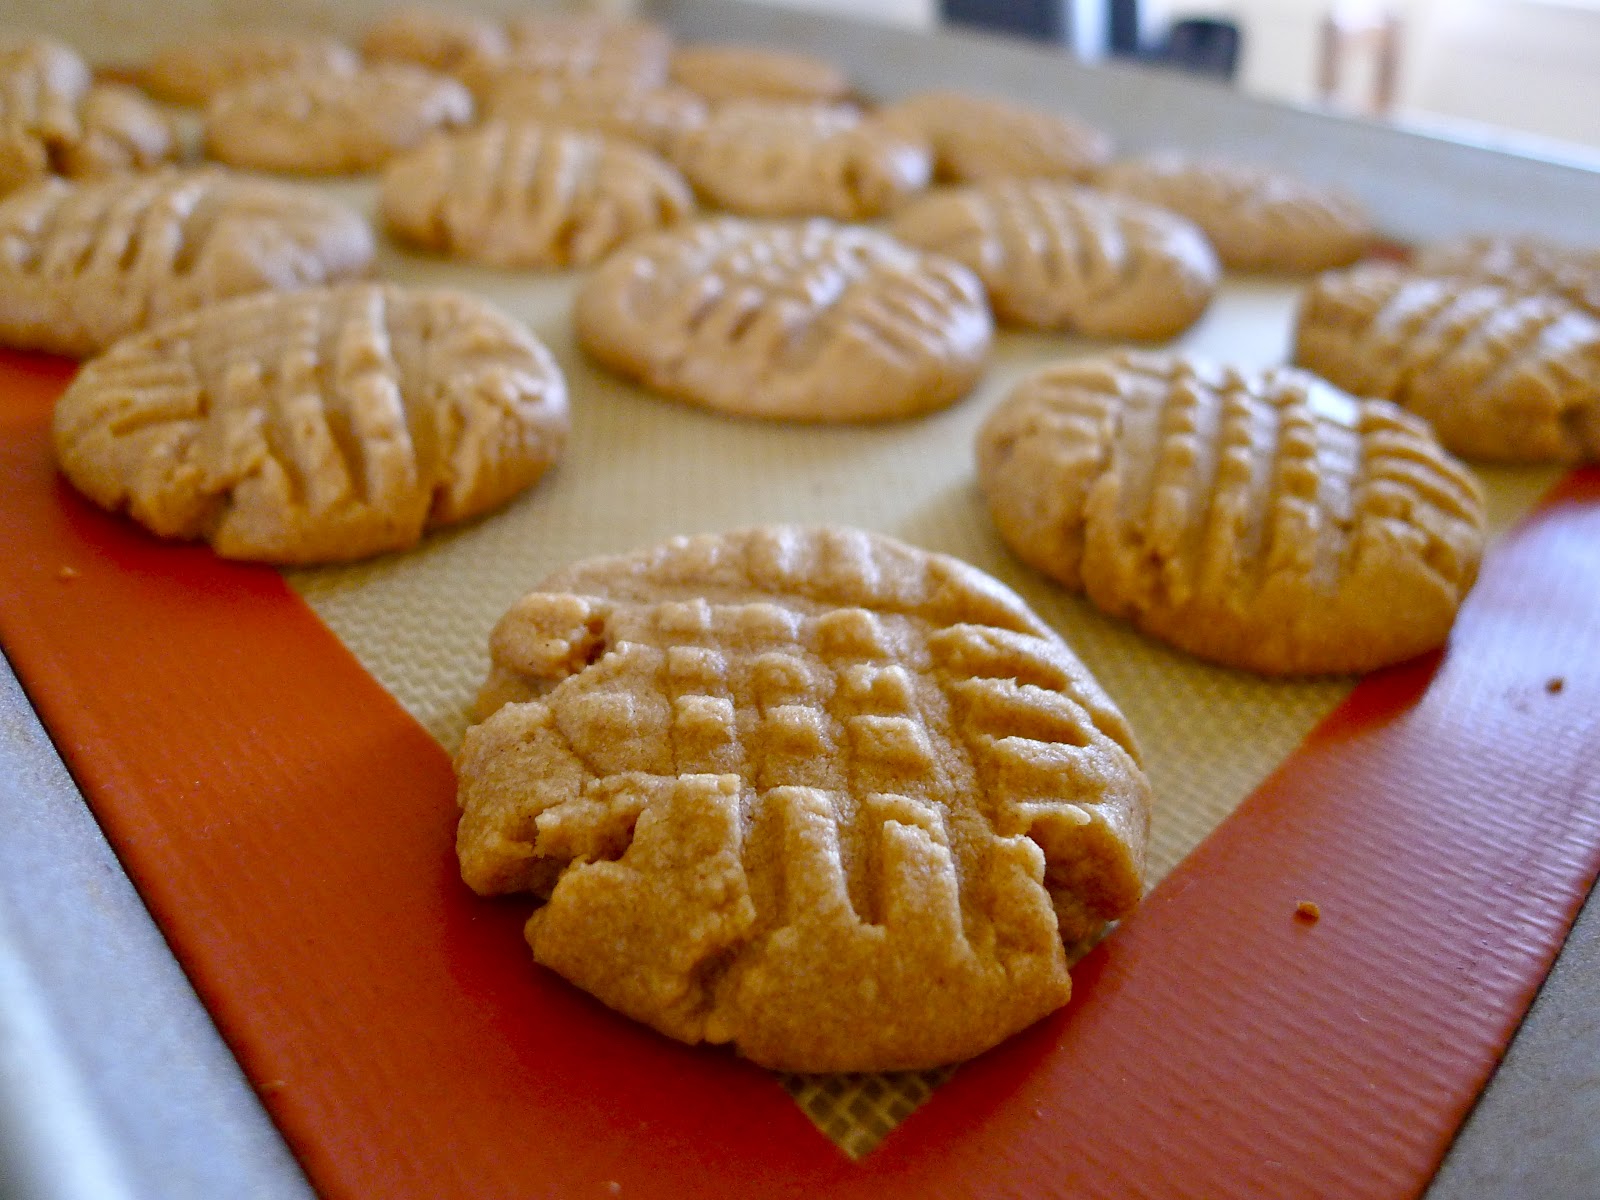
Step 1. Whip up a batch of peanut butter cookie dough. I used this recipe and it was (in my opinion) the perfect texture and flavor for regular cookies and to use in this brownie. Refrigerate overnight.


Step 2. Prepare brownie batter (from scratch or Ghirardelli's Double Chocolate mix - it's so easy and makes brownies better than most).
Prepare muffin tin with cupcake liners, and divide brownie batter evenly among the twelve cups. Form 12 small balls of cookie dough and press into the center of each cup. You may have to spoon some batter over the top of the cookie to completely cover them.


Step 3. Bake in a 325 degree oven for about 25-30 minutes, until the top of the brownies are cracked and the batter is set (just like normal brownies).

Step 4. Make 11 new best friends. Of course, one's for you.


Obviously, the leftover dough has to turn into cookies!


Thursday, April 12, 2012

Back to the classics


Just like it's important to watch the original Star Wars, sometimes it's necessary to go back to the classics and make sure you've got the best recipe possible - one you can always rely on to deliver amazing results with a taste of nostalgia. Clearly, the first stop is chocolate chip cookies.

Say what you will, but a good chocolate chip cookie will always be the ultimate crowd-pleaser, bad day-fixer and good day-improver. Lucky for you, I've gone through a lot of mediocre (and downright bad) cookies on my way to the following recipe, and with my years of trial and error I think I can help you make the best chocolate chippers you've ever pulled out of the oven.


There are a couple of choices that you have to make when working through your ingredient list. Most importantly, chocolate can make or break the finished cookie. I tend to prefer a mix of milk and dark chocolate, which I buy in blocks and chop when needed (or just eat in large chunks). I think it gives more dimension and a sophisticated flavor, but everyone has their own preference - run with it!


Secondly, your choice of flour makes a big difference in flavor and texture. Traditional all-purpose white flour is the usual choice, but I think there's something to be said for tempering sweetness with a bit of the heartier, nuttier flavor of whole wheat. It only took once for me to learn never to bake with "whole wheat flour" - it actually tastes like wheat, and kind of has the texture of sand. Luckily Bob's Red Mill makes a "whole wheat pastry flour" which is much finer ground and lighter texture, and has performed swimmingly in many cookie recipes. It produces noticeably more substantial cookies, but I tend to use it regularly.

Thanks to research and my own experiments, I've determined the following essential steps for the ideal cookie texture and color. Ultimately, you want the dough and baking sheet to be very cold when you put them in the oven, which will prevent over-spreading of the dough and preserve a thick and fluffy cookie.


1. Do not pack the brown sugar while measuring it out - just treat it as normal sugar.
2. Use cold butter. Do not soften the butter before beating with sugar. Electric mixers are more than powerful enough to handle cold butter - apparently that part of most traditional recipes is a relic from pre-power mixer days.
3. Freeze dough in an airtight container for 24 - 48 hours before baking. This prevents excess spreading of the dough when baking. Just make sure you shape the dough into balls before you freeze them!
4. Use a silicone baking sheet or parchment paper. NEVER use a bare cookie sheet.
5. Never use a heated baking sheet for a new batch of cookies. If you're going to reuse the sheet, make sure it's cooled completely before putting dough on it.
6. Remove the cookies from the oven when lightly golden in color, and leave the cookies to cool completely on the baking sheet. Don't move them to a wire rack.


Best Ever Chocolate Chip Cookies
Yields about 30 cookies
Adapted from Betty Crocker

1 C brown sugar (not packed)
1/2 C granulated sugar
1 C (2 sticks) butter
1 tsp vanilla extract
1 egg
2 1/4 C all-purpose flour (or whole wheat pastry flour)
1 tsp baking soda
1/2 tsp salt
2 C chocolate chips or chopped chocolate

 
Directions: Beat butter and sugars in the bowl of an electric mixer for several minutes, until light and fluffy. Scrape down bowl to make sure everything is incorporated. Add vanilla and egg and beat to combine. Gradually add flour, baking soda and salt. Add chocolate when there is still a little bit of flour left to incorporate, so everything comes together at the same time. Scrape down bowl as necessary to prevent pockets of dry ingredients. Don't overmix, as it activates the gluten and can make the dough tough.


Form dough into balls about one inch in diameter, then freeze for at least 24 hours in an airtight bag or plastic container.

Preheat oven to 375 degrees. When oven is up to temperature, place a dozen frozen dough balls onto parchment or silicone sheet and place in oven. Bake for about 10-12 minutes, until top of cookies are a light golden brown. Remove from oven and let cookies cool on the baking sheet (if you can!)


Try and resist...


Sunday, September 4, 2011

A Biscoff break

I think that most people who have spent time in western Europe (and definitely France) have discovered the amazingly delicious little spice cookies that accompany coffee or tea and just seem to pop up everywhere. Many know them by their brand name, Biscoff, but these crisp cookies called speculaas originated in Belgium as treats to be served around Christmas time. They traditionally have images of the story of St. Nicholas stamped on them, and although I've never seen them, there are apparently pans made especially for them!

Speculaas spice is a mouth-watering, heart-warming combination of cinnamon, cloves, nutmeg, ginger, cardamom and coriander. This magical blend is sharp but not too overwhelmingly spicy, and when you smell these cookies baking it will make you feel all kinds of holiday nostalgia. Almost makes me wish it were cold and raining! Almost.

For me, there's an experience of a coffee or tea break that begs a side dish. A square of dark chocolate, a cakey donut or a crisp cookie are essential when I'm starting or taking a break from my day. I was feeling a little homesick for a Parisian sidewalk cafe, and decided to see if this recipe was easy enough to whip up on a regular basis. Good news! - it's so easy :)

It's not identical to the texture of Biscoff, but this recipe captures the flavors perfectly and something about homemade makes it even better. You can make the cookies in varying thicknesses, but I like a balance between crisp and chewy and rolled out the dough to a little over 1/8" thick.

A note about the recipe - it specifies weight instead of volume of the flour and sugar, so the volume approximations are not precise. I used a food scale for a more accurate result.

Speculaas
Spice blend from Seitan is My Motor
Cookie recipe from Tasty Kitchen
Makes about 20 cookies (about 2.5" diameter)


Speculaas spice blend
1 Tbsp ground cinnamon
1/2 tsp ground cloves
1/4 tsp ground cardamom
1/8 tsp ground coriander
1/8 tsp ground ginger
1/8 tsp ground nutmeg

Cookies
8 oz all-purpose flour (or ~2 1/4 C)
5 oz dark brown sugar (or ~3/4 C)
1 tsp baking soda
2 tsp speculaas spice blend
5 oz cold butter, cut into small pieces
4 Tbsp milk

Directions: Combine dry ingredients and then add butter and milk. Blend with an electric beater or cut in with pastry cutter (much more labor intensive, be warned!) until dough is formed. Refrigerate in a disk for at least a few hours.

Preheat oven to 400 degrees. Roll out on plastic wrap or a lightly floured surface to about 1/8" thick and then cut with cookie cutters. Place on prepared baking sheet and bake for about 10 minutes, until fragrant and lightly browned on the edges. Let cool for a minute and then transfer to a wire rack to cool completely.

Going into the oven!

Tuesday, July 26, 2011

Classy

A very dear friend and very classy lady recently celebrated her birthday, and I found myself at a loss of what to make that would be ship-able, yummy, fun yet classic. I remembered that I had some whole vanilla beans in my cupboard, and decided that this would be the perfect time to make and use vanilla sugar. Super simple, but you can't do it unless you have a food processor. Don't fret, these cookies taste are pretty delicious made with vanilla extract!

You can pick any chocolate to dip these in, but of course I always prefer dark (60-70%). Make sure you go through the tempering process, which will avoid the matte colored chocolate coating that melts when you touch it. A little extra effort and a few dollars on a candy thermometer will make a huge difference in the finished product :)

Enjoy these striking, classic and classy cookies!

Vanilla Sugar
Chop 1 vanilla bean into small pieces, then process with 1 C granulated sugar until bean is only seen as small black flecks in the sugar.

Vanilla Sugar Cookies
From allrecipes.com
Makes about 15 cookies


1/4 C + 2 Tbsp butter, room temperature
1/2 C granulated sugar (vanilla sugar if desired)
1 egg
1/4 tsp vanilla extract (omit if using vanilla sugar)
1 1/4 C all-purpose flour
1/2 tsp baking powder
1/4 tsp salt

~6 oz chocolate of your choice (chopped)

Directions: Cream butter and sugar until light and fluffy, about 4 minutes. Add egg and vanilla extract (if using) and beat until combined. Gradually add in flour, baking powder and salt and beat until just combined. Form into a log about 3-4 inches in diameter and wrap tightly with plastic wrap. Freeze or refrigerate until solid.


Preheat oven to 400 degrees and prepare baking sheet with parchment. Slice cookie log, forming cookies that are the thickness you desire. I like thick, chewy cookies so I sliced them about 1/2 inch thick. Place on baking sheet, sprinkle with more vanilla sugar, and bake 6-8 minutes until slightly golden around the edges. Let cookies cool completely on a wire rack.

When cookies are cooled, melt about 4 oz of the chocolate in a double boiler until the temperature reaches 110 degrees F. Add the unmelted remaining chocolate and stir to melt it. Once the temperature has reached 90 degrees, dip the ends of the cookies in the chocolate and place back on the rack or waxed paper to cool and harden. Voila!


Also, you should probably grab everything in the house
and dip those in chocolate too...

Monday, July 4, 2011

DIY

I'll concede to the fact that when you're in the grocery store and hungry for a cold treat (RIGHT. NOW.) the aisles of pre-made ice cream sandwiches are pretty darn appealing - and practical. But if you're willing to delay gratification a teensy bit, this upcoming recipe and method for making your very own ice cream sandwiches is well worth the wait and extra effort!

A note about the method: It's easy to just slap some ice cream between two cookies, but taking the extra step to make ice cream "pucks" will ensure an even distribution of ice cream throughout the cookie, a neater outside edge and reduce the tragic breakage of cookies from pressing down too hard.

I've become enamored with the combination of chocolate, toffee and coffee, and this treat really solidifies it for me. Rich chocolate gets a sweet kick from toffee and depth from coffee, and the contrast of textures is really spectacular. While I advocate this particular combination, feel free to experiment with any kind of mix-ins or exchange the chocolate cookie for a regular butter flavor. You won't be disappointed! Wrap them tightly in plastic wrap and then in a baggie or plastic container and they'll keep for a long time. Or as long as it takes for you to devour them...

Chocolate Toffee Coffee Ice Cream Sandwiches
Cookie recipe slightly adapted from Bon Appetit Desserts by Barbara Fairchild

1/2 C (1 stick) unsalted butter, room temperature
1 C plus 2 Tbsp sugar
1 egg
1 tsp vanilla extract
1 C all-purpose flour (I used whole wheat pastry flour)
1/2 C unsweetened cocoa powder
1/2 tsp baking soda
1/4 tsp salt
3/4 C dark chocolate chips
1/2 C toffee chips or crushed toffee bars

Coffee ice cream (I used Lucerne's Coffee Caramel Swirl from Safeway - it's local and delicious!)

Directions: In an electric mixer, cream butter and sugar until fluffy. Add egg and vanilla and beat until well blended. Sift flour, cocoa powder, baking soda and salt together, then add gradually to butter mixture until well blended (careful not to over-mix). Mix in toffee and chocolate chips. Chill dough until firm. Preheat oven to 350 degrees and prepare baking sheet with parchment while you're waiting.

Roll dough into rounded tablespoonfuls (bigger if you'd like bigger sandwiches). Bake until they puff and crack on top but are still soft, about 11 minutes. Let them cool on baking sheet for 1 minute and then transfer to a wire rack to cool completely.


While the cookies are baking and cooling, take your ice cream out to soften slightly. Spoon into muffin tins and make a (relatively) smooth and even "puck" that's about 1 inch thick. Put tray in freezer for about a half an hour. When the pucks are re-frozen, remove from muffin tins by running a knife around the outside edge. Place puck in the center of two (fully cooled) cookies - enjoy now or wrap tightly and freeze for the next hot day!


There's nothing better on a sunny Fourth of July afternoon!

Saturday, May 28, 2011

Sweet and spicy

Just as I'm about to leave San Diego, I discover a lounge that was literally made for me! It's sad, but I've been making up for lost time and making as many trips to Starlite Lounge as my end-of-school schedule will allow. The atmosphere is beautiful and classy without being pretentious, and both the food and drink menus are very reasonably priced but high quality, inventive and absolutely delicious. Once I tasted the Velvet Diablo cocktail on my first trip, I knew that no other cocktail would ever measure up. It blends spicy and fizzy ginger beer, sweet creme de cassis, zesty lime and the punch of tequila - in other words, perfection. 

I had never really thought of using ginger in combination with a sweet and tart berry flavor, and when I was thinking of what to bake for my last weeks in San Diego, I knew that I had to somehow incorporate the Velvet Diablo. The result is below - buttery shortbread with a little zing of ginger sandwiching the creamy tartness and sweetness of fresh blackberry. Great for impending summer weather and even better for my last memory of baking in San Diego. 

NOTE: The buttercream needs to be refrigerated in order to stay relatively solid, so make sure the cookies are completely cooled before piping the filling and put them in the refrigerator after assembling. Don't leave them out for more than 10-15 minutes before eating :)


Velvet Diablo Shortbread Sandwiches
Adapted from Evil Shenanigans
Yields about 2 dozen sandwich cookies

Ginger shortbread cookies
1 1/3 C all-purpose flour
1/3 C cornstarch
1/2 tsp baking powder
10 Tbsp butter, room temperature
2/3 C powdered sugar
1-2 tsp ground ginger (depending on how spicy you'd like the cookies)

Blackberry buttercream
5 Tbsp butter, room temperature
2 Tbsp finely diced fresh blackberries (pull out the chunks of stem)
1 1/2 C powdered sugar
1/2 tsp vanilla extract


Directions: Preheat oven to 350 degrees and prepare baking sheets with parchment. Combine all ingredients for cookies in the bowl of a stand mixer with a paddle attachment, and mix on low speed until the ingredients just come together. Increase speed to medium-high for about 30 seconds, until the dough starts to clump around the paddle. If you can't get it to incorporate after a couple of minutes, add water (maybe 1-2 tsp) to bind the dough better. On a lightly floured surface, roll out dough to about 1/8 inch thick. Cut with a cookie cutter (I use a shot glass!) and place cookies onto baking sheets about 1/4 inch apart. Continue re-rolling and cutting until all dough is used. Bake for 8-10 minutes, until cookies are slightly puffed and just golden on the bottom edge. Cool completely on pans.

For buttercream, cream butter and blackberries then add powdered sugar. Blend until smooth. Add extra powdered sugar until the filling has the consistency of cake frosting.
Once the cookies are cool, pipe a dollop of filling onto the undersides of half of the cookies, then sandwich. Refrigerate until serving!


Tuesday, May 10, 2011

Peanut Butter Toffee Bites

 Sometimes experiments go horribly wrong, sometimes they're perfect, and sometimes they're not what you planned just as delicious! These cookies definitely fall into the latter category. I was trying to modify the traditional Chocolate Crinkle cookie recipe to work with new flavors, but adding peanut butter soaked up the powdered sugar and eliminated the "crinkle" part of the cookie! Not to worry, the final product was like a little crunchy, gooey, sweet peanut butter ball.

The texture was definitely not what I expected, but the flavors of toffee and peanut butter are a killer combination and the end result was met with much nodding and thumbs up while chewing. I'm sure you could make these crispier if you prefer, but why would you want to miss out on the chewy goodness of slightly under-baked peanut butter?


Peanut Butter Toffee Bites
Makes about 20 cookies


2 eggs
1/2 C granulated sugar
1/4 C peanut butter (crunchy or smooth, you know which one you like!)
2 tsp vanilla extract
1 1/2 C all-purpose flour
1/4 tsp salt
1/2 tsp baking powder
~1/2 C chopped Heath toffee bar (about 3 bars)
~1/2 C powdered sugar

Directions: Beat eggs and sugar together in an electric mixer until thick, pale and fluffy. Then beat in vanilla extract and peanut butter until completely combined. Whisk together flour, salt and baking powder in a separate bowl, then stir into peanut butter mixture until just combined, adding toffee bits just before it's done. Refrigerate dough for about 1 hour until firm enough to shape into balls. Meanwhile, preheat oven to 325 degrees and line a baking sheet with parchment.
Roll a small amount of chilled dough into balls about 1 1/2 inches in diameter. Roll in powdered sugar until thoroughly coated, then place on baking sheet. Bake for about 10 minutes or until dough is solidly set (they taste great a little bit under-baked).

Saturday, March 5, 2011

Black and white

I have a bottle of Bailey's sitting on my countertop that stares at me every day, begging to be put to good use. It truly is the best liqueur to use in baking, but the flavor is so distinct that it can't be combined with just anything. Chocolate is the obvious choice, but what about Irish coffee? Throw a splash of Bailey's and whiskey in your coffee and you have an extra delicious combination - and inspiration for this cookie!


Checkerboard cookies are super simple but look complicated and snazzy when they're finished. They're also "icebox" cookies, which means you can make them over the course of two days if you need to. It's the perfect busy-day cookie, and also goes well with that third cup of coffee to keep you going! These cookies are basically shortbreads, made with no egg and just a lot of butter. Slightly crumbly, very tender and all kinds of delicious as the coffee/chocolate and Irish Cream flavors melt in your mouth!

Irish Cream Checkerboard Cookies
Adapted from Martha Stewart
Makes about 18 cookies

1 C unsalted butter, softened
1/2 C sugar
1/4 tsp salt
2 1/2 C all-purpose flour, sifted
2 tsp Bailey's Irish Cream
3 Tbsp cocoa powder
2 tsp finely ground coffee
1 egg

Directions: Cream butter and sugar in an electric mixer until well-blended. Add salt and flour gradually. Separate dough in half, placing one half in a separate bowl. Add Bailey's to one half, and mix slowly until just combined. Clean out bowl and mix other half of the dough, cocoa and coffee in it until just combined. Place each half of the dough in between two sheets of plastic wrap and roll into 7" squares about 3/8" thick. Using a sharp knife and a ruler, slice each square into 9 strips, about 3/4 inch wide. It doesn't matter all that much how wide the strips are, as long as they are the same width!

Whisk together egg and 1 Tbsp water. On a sheet of plastic wrap, place three strips of dough next to each other, alternating light and dark. Brush tops and sides of each strip with the egg wash, and gently press them together. Repeat with a second and third layer, alternating colors to create a checkerboard. Wrap log in plastic. Repeat to form a second log, switching the color pattern. Refrigerate logs for at least 30 minutes or freeze for 15.

Preheat oven to 350 degrees and line a baking sheet with parchment or silicone. Slice each log according to how thick you'd like your cookies. The original recipe recommends 1/4" thick, while I liked a doughier cookie and made about 1/2" slices. Bake until lightly golden and firm, about 10-12 minutes.

Monday, February 21, 2011

Crunchy gooey goodness

Every once in a while, I get the urge to combine as many delicious things as possible and see if they are even more delicious together. Most of the time, it's a very successful experiment.

This time around, I focused on cookies, caramel and chocolate. I've recently been hankering for graham crackers, and wondered if it would be possible to recreate these childhood favorites from scratch. The recipe I found doesn't make perfect replicas of HoneyMaid, but I might venture that these are even better! They're a little bit denser and crunchier, and have an even more distinctive brown sugar taste. Plain out of the oven, these would be an amazing accompaniment to breakfast coffee and would probably be very nice when dunked :)

As for the second layer, I zeroed in on salted butter caramel. Ever since my time in France, I have been awakened to the beauty of salted butter caramel. Sweet, a little salty, and overall the most creamy and buttery thing you will ever consume. I get a little nervous working with sugar over high heat, but this recipe was surprisingly simple and only has a few ingredients. Whether or not you use the caramel to make the final cookies, it's a ridiculously delicious dipping sauce for pretzels, nuts, chocolate, and pretty much anything else you can find in your house.

Chocolate is chocolate, but there is a way to temper it that prevents that matte finish on your coating that melts in your hands. You need a candy thermometer, but it's a worthwhile $6 investment.
So, here goes. It's a multi-step process that will take a couple of days, but I can tell you that the finished product is well worth the wait. Indulge, my friends!

Caramel Chocolate Grahams

For the graham crackers
1 C whole wheat pastry flour
1 1/2 C all-purpose flour
1 C dark brown sugar, packed
1 tsp baking soda
3/4 tsp salt
7 Tbsp unsalted butter, cut into 1-inch cubes and frozen
1/3 C mild honey (like clover honey)
5 Tbsp milk
2 Tbsp vanilla extract

For the caramel
From Drizzle and Dip
400 g sugar
165 g butter
250 mL cream
salt to taste

8 oz dark chocolate

Directions:
For the graham crackers
Combine flour, brown sugar, baking soda and salt in a food processor and pulse to combine. Add butter and pulse until the mixture is a coarse meal. If you don't have a food processor, use a pastry cutter by hand. Whisk together honey, milk and vanilla in a separate bowl, then add to the dry ingredients and pulse until the dough barely comes together. Turn dough out onto a sheet of plastic wrap, and dust lightly with flour or powdered sugar to keep from sticking. Shape into a rectangle and refrigerate for at least 2 hours.
Roll refrigerated dough out onto a floured surface to 1/8" thick (I rolled it between two floured sheets of parchment). Cut into the desired shape, then place onto a parchment or silicone-lined baking sheet. Chill for another 20 minutes in the freezer while you preheat the oven to 350 degrees. Decorate crackers with any perforations or dots. Bake crackers for 15-25 minutes or until lightly browned and slightly firm to the touch.  Cool completely on a wire rack.


For the caramel
Heat sugar without stirring in a large heavy-bottom saucepan over medium-high heat. Once sugar has dissolved completely, remove the pot from the heat and whisk in butter in small pieces while continuously whisking. Return pot to heat and add cream while still whisking vigorously. When the sauce becomes smooth and combined, remove from heat and add a sprinkle of salt. Allow it to cool completely and stir in another good sprinkle of salt.


For the chocolate coating
Melt chocolate (minus about 1 oz) in a double boiler over medium-high heat. Make sure the mixture reaches at least 105 F, then add in "seed" chocolate of 1 oz remaining room temperature chocolate. Remove from heat and stir to reduce the temperature. Maintain the temperature between 88-90F before using it.

To assemble cookies
Place cookies on a wire rack over wax paper. Spread a thin layer of room temperature caramel over the top of each cookie, then pour a layer of chocolate over the cookie, coating the top completely. Let cool completely - enjoy!


Friday, January 21, 2011

Summer in January

I am very fortunate to say that I live in San Diego - for many reasons, of course, but the weather is undeniably the biggest perk for a weakling like me. Our year runs the spectrum from a blustery 50 degrees to a scorching 85, and seems to disregard typical ideas of "seasons" (whatever those are). I'm writing this wearing a tank top, with a scarf thrown on for a little seasonal flair. 


There are some desserts that just work with certain weather. I can't handle super heavy chocolate or gingerbread-y things in the middle of summer, and a light cake seems inappropriate when you're bundled in front of the TV trying to maintain feeling in your hands. Luckily for me, the weather cooperated with me on this recipe and delivered an amazing 80 degree week in the middle of January so I could enjoy the following light, tender, sugary cookies! 


The main flavors here are buttermilk and lemon, which are nicely refreshing and tangy. Buttermilk, shockingly, contains no butter but is in fact the slightly sour residual milk that remains after butter is churned. If you don't churn your own butter,  commercially produced "cultured buttermilk" is made from fermenting milk with lactic acid bacteria. In baked goods,  it tenderizes and adds a little tang from that fermentation process.

NOTE: Buttermilk substitute is easy to make! Just add 1 Tbsp lemon juice or white wine vinegar to 1 C of whole milk and let sit for at least 5 minutes. Voila! Cultured.


Buttermilk Cookies
From Gourmet magazine (2008) by way of Ezra Pound Cake
Makes about 5 dozen cookies


3 C all purpose flour
1 tsp finely grated lemon zest
1/2 tsp baking soda
1/2 tsp salt
1 1/2 sticks unsalted butter, softened
1 1/2 C granulated sugar
2 eggs
1 tsp vanilla extract
2/3 C buttermilk (or milk and lemon juice)

Glaze
1 1/2 C powdered sugar
3 Tbsp buttermilk (or milk and lemon juice)
1/2 tsp vanilla extract

Directions:Preheat oven to 350 degrees and prepare two baking sheets with parchment. Whisk together flour, lemon zest, baking soda and salt and set aside. Cream butter and sugar with an electric mixer until pale and fluffy. Add eggs one at a time, then vanilla. Mix in flour and buttermilk in alternating additions - starting and ending with flour.

Drop tablespoons of dough on the baking sheet, leaving at least 1 1/2 inches between the cookies (they spread!). Bake until cookies are puffed and golden, about 12 to 15 minutes. Remove from oven. Whisk together all glaze ingredients and pour over cookies while they are still warm. Let cool completely.

Monday, January 17, 2011

Slice and bake

One time when I was eight, I won an Oreo stacking contest in Safeway. I won a t-shirt, and lifelong pride. This post has nothing to do with that other than these cookies are very stackable...

I've recently been intrigued by using cornmeal in baking, after a few lovely encounters with cornmeal scones at my favorite coffee shop. When I stumbled upon this recipe, I thought it looked like the perfect way to experiment. The beauty of these cookies is that you can make them in any size you like, but I enjoyed making them about an inch and a half in diameter like called for in the original recipe. They're not too sweet, and are the perfect refreshing little nibble.

If you'd like to add a little different flavor to the cookie, try soaking the cranberries in rum, brandy, a fruity liqueur... or honey (like I did). Also, make sure you refrigerate the dough for at least 2 hours, preferably overnight. Other than that, it's pretty straightforward. Mix, roll, chill, slice and bake. And of course, snack away :)

Lemon Cornmeal Cookies
Adapted from 6 bittersweets

1/2 C (1 stick) unsalted butter, room temperature
1/2 C sugar
1 tsp grated lemon zest
1/3 tsp salt
2 egg yolks
1/2 C yellow cornmeal
1 1/4 C all purpose flour
2/3 C dried cranberries (about 4 ounces)


Using an electric mixer, cream the butter and sugar until fluffy. Beat in lemon zest and salt, then egg yolks. Beat in cornmeal, then flour. Stir in cranberries. Knead dough until combined, then divide in half. Use plastic wrap to roll dough into logs 1 1/2 inches in diameter (or whatever size you'd like the cookies to be). Refrigerate for at least two hours.

Preheat oven to 325 degrees. Line baking sheet with parchment paper. Slice dough log into 1/4-inch-thick rounds and place on baking sheet, reshaping them if necessary.

Bake cookies until golden at edges, about 15 to 18 minutes. Transfer to rack to cool. 

Friday, December 10, 2010

Feliz Navidad!

I can't pretend to take credit for this magical combination of flavors, but I am very excited to have found a combination of textures that showcases them in an unbelievably delicious fashion! While I'm still not up to the level of liking "spicy" chocolate, I've grown very fond of Mexican chocolate spiced with cinnamon and various types of pepper. I wanted to try to incorporate Mexican chocolate into this homemade "oreo" recipe I found, and while the cookies are not spicy by any means, the cinnamon and pepper adds a nice subtlety of spice to the cocoa powder. As for the filling, I wanted to experiment with dulce de leche, a wonderful product I hadn't learned about and fallen in love with until the last few years. Its sweet caramel taste and smooth, gooey texture are the perfect complement to the crisp, buttery cookies that sandwich it in this recipe. Be warned - you may not be able to stop at one... or four...


Mexican Chocolate Oreos
1. Bake chocolate cookies, let cool completely.
2. Make dulce de leche using microwave method (below) or another if you prefer.
3. Pipe dulce de leche onto half of the chocolate cookies and sandwich with the other half.


Mexican Chocolate Cookies
Adapted from Thomas Keller's Oreos


3/4 cup sugar
1 1/2 cups all-purpose flour plus 3 tablespoons 
3/4 cup unsweetened cocoa plus 1 tablespoon
1/2 teaspoon baking soda
1 1/2 teaspoons salt

3/4 tsp cinnamon
1 tsp vanilla extract
generous pinch of black pepper
generous pinch of cayenne pepper (if you want extra spice)
15 tablespoons (7 1/2 oz) unsalted butter, cut into 3/4-inch cubes, at room temperature


cinnamon and raw sugar for dusting (optional)


Directions: Preheat oven to 350 F and line baking sheets with parchment. In the bowl of a stand mixer fitted with the paddle attachment, mix the sugar, flour, cocoa powder, baking soda, cinnamon, black pepper and salt on low speed until combined.  With the mixer still on low speed, add the butter a few pieces at a time until it is all in the bowl.  The dough will look sandy for a long time, but just let it keep mixing for a few minutes.  When the dough does start to come together, stop the mixer.

Transfer the dough to a work surface and divide into two pieces. Working with one half at a time, roll the dough on a lightly floured work surface or parchment until it is 1/8-inch thick.  Cut rounds from the dough and place them 1/2 to 1 inch apart on the prepared baking sheets. Sprinkle with cinnamon and raw sugar if desired. Continue re-rolling and cutting until all the dough has been used.

Bake for 12-15 minutes, rotating the baking sheets halfway through. Let cookies cool on the baking sheet for 4-5 minutes, then transfer to a wire rack to cool completely. 


Dulce de Leche Filling

Dulce de leche (known as confiture du lait in France) is a lovely caramel-like sauce or flavoring that is used in many Latin American dessert products. Depending on the texture, you can drizzle it on ice cream, use it to fill tarts or make sandwich cookies! Delish. It is traditionally made by simmering a can of sweetened condensed milk in a pot of water for several hours, but I came across a microwave method that seemed a little more practical. I had to microwave the dulce de leche for a minute after the recommended 

Microwave method from The Perfect Pantry

1 14-oz can of sweetened condensed milk (like La Lechera)

Directions: Empty sweetened condensed milk into a large glass bowl and cover with plastic wrap. Leave a small part uncovered to allow steam to escape. Microwave at medium heat (level 5 if you have 10 power levels) for 2 intervals of 2 minutes each. In between each heating, uncover and stir with a wire whisk. Then heat for 10 minutes in 2 1/2 minute intervals, whisking in between. With each heating, the milk will get thicker and become more caramel colored. After the 10 minutes, you may need to microwave for a longer time to get the desired thickness. Heat for 2-3 more minutes in 1 minute intervals until it's very thick (I heated it for 1 more minute). Let cool completely before using.

SAFETY NOTE! The bowl and milk will get very hot by the time you're about 6 minutes in, so please please use oven mitts or a towel to grab the bowl out of the microwave and use caution when uncovering and whisking. Also, the reason you need to use a large bowl is that if the milk touches the plastic wrap, it will melt it - and no one wants chunks of plastic in their dulce de leche. End of story, be careful - I don't want anyone to be burned in the pursuit of dessert! 

Put on your yarmulke...

... it's past the last day of Hannukah! I am super late on this, but I don't want to completely leave out Hannukah in the celebration of yummy baked things. I've become an honorary Jew this year thanks to my roomies, and I'm embracing the experience of lighting the candles each night over some matzo ball soup.

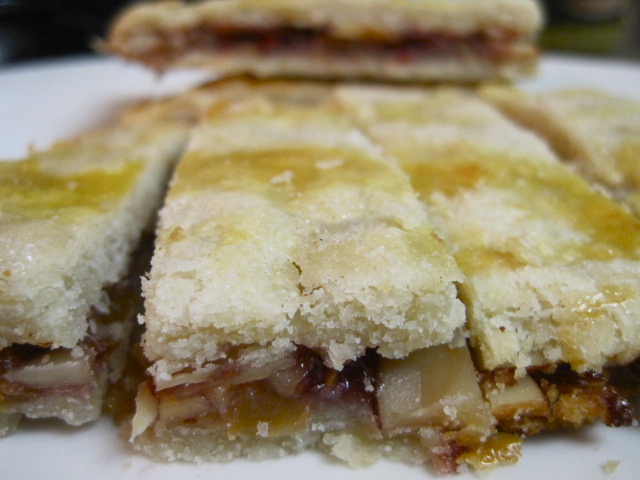
I first fell in love with ruglach when I found them in my mom's international cookie cookbook as an 8 year-old, and when I saw this new interpretation of the traditional Jewish cookie I knew I had to try it! I love the traditional filling of cinnamon and nuts, but I wanted to try something different so I mixed up a combination of raspberry, raisins and sliced almonds.

The verdict? My coworkers and roommates thought they were delightful, and I loved that they're a flaky, light but filling departure from many other holiday cookies. Feel free to experiment with different fillings - I've seen Nutella and hazelnut, walnut and cinnamon and many others!

Raspberry Raisin Almond Ruglach Bars 
Adapted from Hungry Rabbit

1 1/2 sticks unsalted butter, cold and cut into 1/2" pieces
8 oz cream cheese
2 C all-purpose flour
1/2 tsp salt

1 C raspberry jam
1/2 C golden raisins
1 C sliced almonds

1 egg yolk
3 Tbsp granulated sugar

Directions: Mix butter and cream cheese with a paddle attachment on low speed until cream cheese is broken down but butter is still slightly chunky. Add flour and salt at low speed and mix for about 20 seconds - until the dough begins to hold together but is still crumbly. Divide the dough into two and press together two rectangles on plastic wrap. Wrap tightly and refrigerate for at least 5 hours.

Preheat oven to 350 degrees. Toast sliced almonds on a foil-lined baking sheet until golden brown and fragrant. Remove and let cool. Line a baking sheet with parchment. Roll out one dough rectangle to a 9" x 13" rectangle and lay on the baking sheet. Spread raspberry jam over dough, then sprinkle raisins and almonds evenly over. Roll out second sheet of dough, lay over filling, and trim edges to match. Brush egg yolk over top layer and sprinkle with sugar. Bake until golden, about 30-35 minutes, rotating halfway. Cool on a wire rack and cut into 24 bars about 1" x 3 3/4" in dimension.


Wednesday, December 8, 2010

A very merry gluten-free holiday

The plight of my gluten-free friends is never far from my mind. I myself try to eat gluten-free except for my baked goods, because although I'm not allergic, I find that less gluten makes me feel so much better!

Fun fact: Gluten is a protein found in rye, wheat and barley, and is responsible for the toughness you get in baked goods when you over-knead or mix dough. It is not found in rice, corn, quinoa, oats, or soybeans.

So in the gluten-free spirit, I decided to give this recipe a shot. I've become enamored with the flavor of pistachio since my time in Paris - they use it a lot there, while it's relatively rare to find here in the states. Because this recipe uses both almond meal and pistachios, it's a little pricey, but once I tasted the finished product I decided it was well worth the cost!

The only trick to this recipe (which is super easy) is to grind the pistachios. I don't have a food processor at school (Christmas...?) but I do have a coffee grinder which worked splendidly. Chopping by hand really won't work because the consistency of the cookie is much better when you have a flour-like consistency for the almond and pistachio.

So rejoice gluten-free and gluten-loving friends - this is the easiest and most lovely recipe you'll find this holiday season! Enjoy!

Italian Pistachio Cookies
Adapted from Trissalicious
Makes about 12 cookies


1 C dry roasted unsalted pistachio nutmeats, ground finely
1 C dry roasted unsalted pistachio nutmeats, chopped coarsely
1 C almond meal
1/2 C granulated sugar
2 egg whites

Directions: Preheat oven to 350 degrees and line a baking sheet with parchment. Mix all ingredients together except for the coarsely chopped pistachios. Roll rounded tablespoonfuls in the chopped pistachios, then place on baking sheet. Bake for about 13 minutes.


Monday, October 18, 2010

A bite of fall

I have a weakness for crisp air, a little bit of rain, red and orange leaves and shortened days. Fall is by far my favorite season, not least because it seems to just require cinnamon, nutmeg, pumpkin and often a little bit of chocolate. I'm definitely mentally preparing for the Christmas season, but there's a lot to be said for relishing the season in between summer and winter and all the fantastic flavors that beg to be brought to life.
Pumpkin is an interesting ingredient to use, because it adds a lot of moisture and lightness to the texture as well as a certain sweetness. Plus, it is super healthy (it's orange!) and contains lots of fiber and vitamins A and C. What's not to love?
This cookie recipe is a little bit tweaked from the original, and I think it is one of my favorite in my repertoire. It definitely got rave reviews, and I would recommend making enough to share :)

Pumpkin Chai Chocolate Chip Cookies
Adapted from The Culinary Couple
Yields about 2 dozen cookies

2 C whole wheat pastry flour
1 1/2 C old-fashioned oats
1 tsp baking soda
2 tsp chai spice blend (2 parts cardamom, 2 parts ginger, 1 part cinnamon, 1 part nutmeg, 2/3 part cloves, 2/3 part nutmeg, 2/3 part allspice, 1/3 part white pepper)
1/2 tsp salt
1 C (2 sticks) butter, softened
1 1/2 C packed brown sugar
1/2 C granulated sugar
1 C pumpkin puree
1 egg
1 tsp vanilla extract
1 C dark chocolate chips
raw sugar

Directions: Preheat oven to 350 degrees. Line baking sheet with parchment. Combine flour, oats, baking soda, spices and salt and set aside. Beat butter and sugars in a large bowl until light and fluffy. Add pumpkin, egg and vanilla, mix well. Add flour mixture and combine until all ingredients are incorporated. Fold in chocolate chips. Drop rounded tablespoons onto baking sheet and sprinkle with raw sugar. Bake for 12-14 minutes, or until cookies are lightly browned.